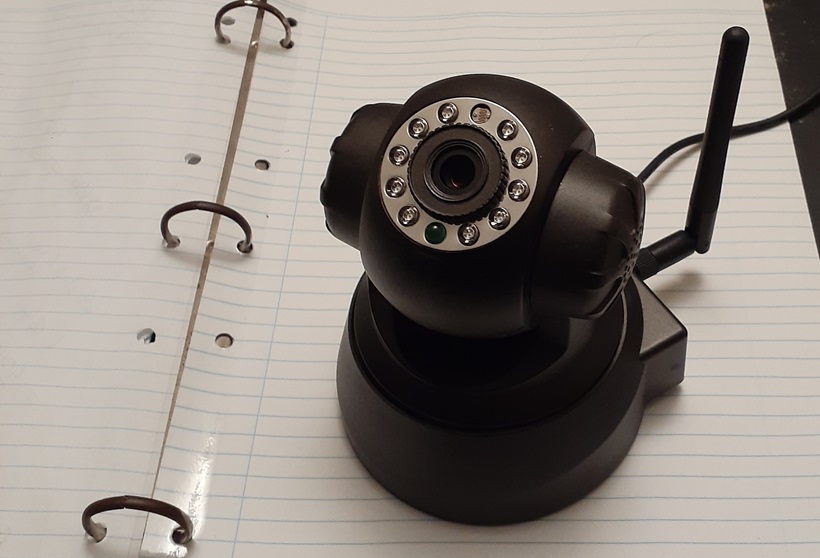
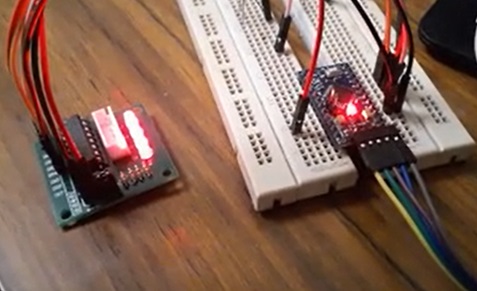
Let’s take an old 640×480 WiFi IP camera, gut it, upgrade the camera to a 5MP USB, and re-animate the PT mechanism with an Arduino Pro Mini, sequencing ULN2003A stepper drivers.
The result will be a tracking mechanism for up to 2 variously telescopic cameras, suitable for image capture, processing and motion tracking experimentation.

Why Fossie had to die.
IP Cameras are usually accompanied by a CGI mechanism with which you can control them using a web browser. There are all manner of setting related to camera tuning, and PT(Z) motion control. As an example:
http://192.168.0.115/decoder_control.cgi?command=0&onestep=1This was Fossie’s command to raise the PT mechanism one degree. The interface gave full PT stepper motor control, and had a particular setting for x or y motor speeds. Unfortunately, an attempt to change any of these axis traversal rates, has to be followed by an immediate CGI initiated system reset, to be successful. That made effective control, initially via joystick, unviable.
23/10/24
No dissection just yet. From this slightly later model Foscam camera teardown video, I discovered that the two stepper motors are both 28byj-48-5v unipolar, 64:1 reduction gear, 5-wire with XH-5P socket type. They may be driven to between 10RPM and 15RPM, with 4096 half steps or 2048 full steps per revolution.
Time to review the state of the art in off-the-shelf software for stepper motor drive under client system control.
25/10/24
Okay, it looks like the single best option for controlling a stepper motor equipped Arduino remotely, from python (urgh!) or javascript running on a client PC, is ConfigurableFirmata. Paint yourself into a corner with a thing called Telemetrix if you must, but you’ll find the former option your best bet. The latter is only supported by one client library (python), it isn’t at all extensible, and the developer responsible appears to be quite self-important.
1/11/24
Here are some important facts about the two versions of the ConfigurableFirmata Arduino library that you will need to know:
- Version 2.x – No support for ESP32, but wide support under client libraries (firmata.js, Johnny-Five, pyfirmata, etc.)
- Version 3.x – Support for ESP32, but little support under client libraries, save for the .Net library iot, and possibly some others.
Some ConfigurableFirmata client libraries, their language, and the version of the Firmata protocol they currently support:
- firmata.js – JavaScript – Firmata protocol version 2.5.
- Johny-Five – JavaScript – Firmata protocol version 2.5 and some 2.6.
- pyfirmata – Python – Firmata protocol version 2.1 and some 2.2.
ConfigurableFirmata version numbers mirror the Firmata protocol version they implement. I spent a lot of time learning this the hard way, that protocol support of the chosen client library, must be matched with the appropriate ConfigurableFirmata library version. Also, that the ConfigurableFirmata library must be matched to code derived from it’s version’s ConfigurableFirmata.ino example.
Here’s the list of versions and artefacts I was able to run successfully together on the AT328PB I will use in this project:
- Arduino IDE – arduino-ide_2.2.1_Linux_64bit.
- ConfigurableFirmata Arduino library version 2.10.1.
- Server sketches based on the ConfigurableFirmata.ino example from version 2.10.1.
- Node JavaScript client library – Firmata.js current version (1/11/24).
- Client javascript implementations based on examples from the current Firmata.js, running in node 12.22.9 on client PC.
You may find the ConfigurableFirmata server sketches produced by the site at firmatabuilder.com useful, be be aware that they should only be built with the 2.10.1 version of the ConfigurableFirmata Arduino library. Get this wrong and you’ll be in a very dark place.
2/11/24
Yep, ConfigurableFirmata and firmata.js do everything they will need to for this project. I’m now intending to use an AT328P microcontroller, rather than the AT328PB that required changes to ConfigurableFirmata’s boards.h file that I couldn’t quite muster.

Time to brush-up on my server-side JavaScript, as we will be initially controlling the camera via a web browser interface, served by a webserver running node. Got my nose buried in a pdf of ‘Node.js for Beginners -A comprehensive guide to building efficient, full-featured web applications with Node.js’ ~Ulises Gascón.
12/11/24
Trying to get my head around asynchronous programming, the model that javascript on Node.js employs. The book I previously referenced isn’t that comprehensive, so I’m augmenting my erudition with some carefully procured lessons from ChatGPT. What a wonder!
12/12/24
Okay, to control the speed and direction camera’s stepper motors, using a gamepad connected to a remote browser, the chain of events begins at the client. In the index page served by the remote camera, we establish periodic calls to a controlInputsLoop(). This function employs the Gamepad API to access the gamepad, and read it’s inputs. The data is then sent to node.js endpoints, asynchronously, using AJAX (Asynchronous JavaScript and XML) calls. The cycle repeats.
<!DOCTYPE html>

<html lang="en">

  <head>

    <meta charset="utf-8">

    <title>Remote Camera</title>

  </head>

<body>

  // Embedable frame sequence URL of MotionEye on Raspbian GNU/Linux 11 (bullseye)
  <img src="http://192.168.0.114:8765/picture/1/frame/">

</body>

<script>

var controlIntervalID;

window.addEventListener("gamepadconnected", function() {
  // Call gamepad control handler every 100ms.
  controlIntervalID = setInterval('controlInputsLoop()', 100);
});

window.addEventListener("gamepaddisconnected", function() {
  clearInterval(controlIntervalID);
});

function sendCommand(request)
{
  const xhttp = new XMLHttpRequest();

  // What to do when the response is ready.
  xhttp.onload = function() {
    // nothing
  }

  // Initialise the GET request with the URL in `request`
  xhttp.open("GET", request, true);

  // Send the request
  xhttp.send();
}

function buttonPressed(b) {
  if (typeof(b) == "object") {
    // Access true or false pressed property of b.
    return b.pressed;
  }
  return b == 1.0; // Return true if b numeric 1.0, false otherwise.
}

controlInputsLoop()
{
  // Returns all connected gamepads.
  var gamepads = navigator.getGamepads();

  if (!gamepads)
    return;

  // Get the first gamepad.
  var gp = gamepads[0];

  if (buttonPressed(gp.buttons[8])) {
    // System shutdown command.
    sendCommand("/control/shutdown=1");
  }

  // Acquire control positions between -1.0 to 1.0.
  var altitude = gp.axes[3].toFixed(4);  // Right Y axis
  var azimuth  = gp.axes[2].toFixed(4);  // Right X axis

  sendCommand("/altitude/" + altitude);
  sendCommand("/azimuth/" + azimuth);

  return;
}

</script>

</html>
Expect this code to evolve as the project progresses.
Next, we will serve the index page, and create endpoints for each of the data sinks using node.js.
to be continued…

