
Wire an Espressif esp-prog debugger to a ESP-WROOM-32 DEV KIT MODULE, and setup debugging on Platformio.
Prerequisites:
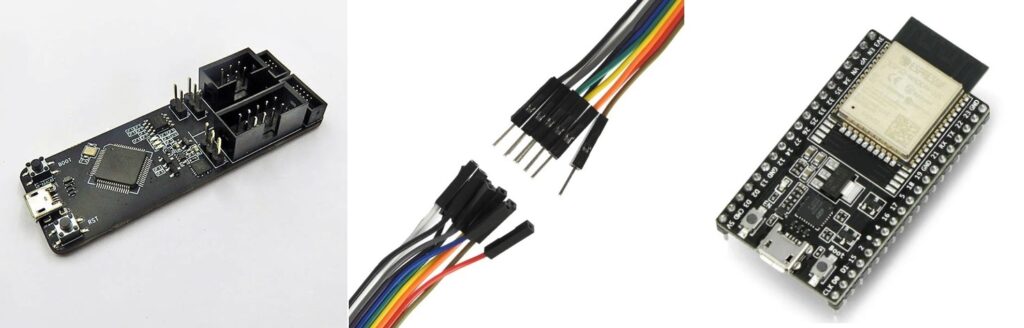
- esp-prog debugger.
- ESP-WROOM-32 DEV KIT MODULE (or ESP-WROOM-32 chip).
- 6-12 Dupont leads, male to female.
esp-prog IDC to ESP-WROOM-32 and DEV KIT MODULE wiring
A typical setup involves using the esp-prog JTAG interface for uploading and debugging.
To monitor program output during runtime, you can either use the built-in FTDI serial of the esp-prog, or save on extra wiring by utilising the onboard FTDI serial of the ESP-WROOM-32 Dev Kit Module. Source selection is automated.
If you choose the latter option, you can safely connect the VDD 3V3 line of the esp-prog to the USB-powered Dev Kit Module, as the esp-prog includes reverse current protection circuitry.
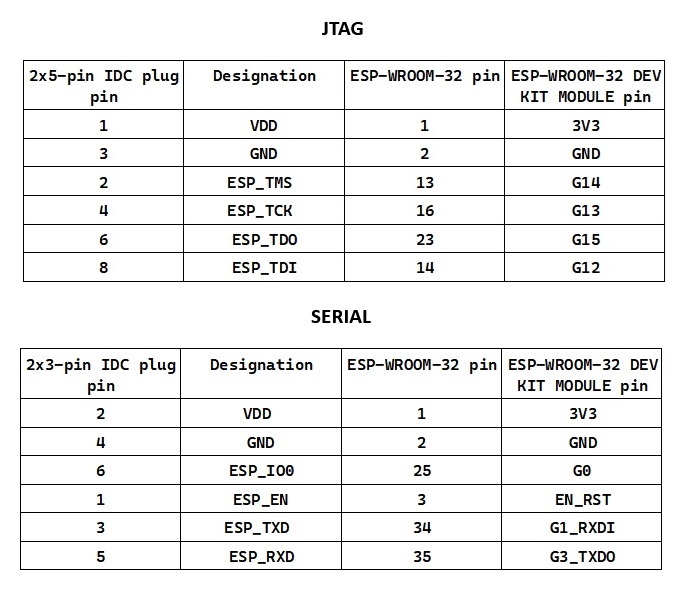
esp-prog IDC pinouts

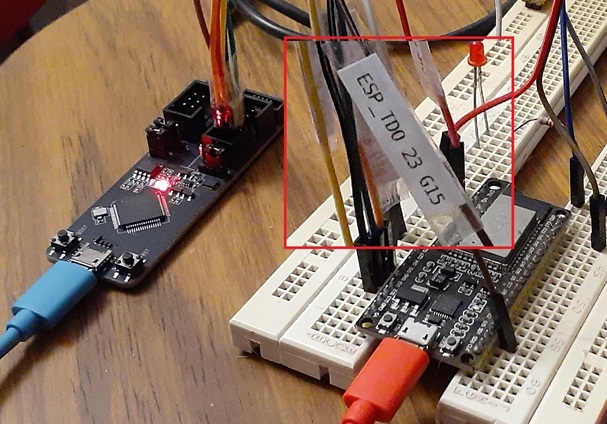
Add wiring tags to DuPont leads
Print this file esp-prog_wiring_flags.txt, cut out wiring tags, and Sellotape them to your DuPont leads.
platformio.ini file
; PlatformIO Project Configuration File
;
; Build options: build flags, source filter
; Upload options: custom upload port, speed and extra flags
; Library options: dependencies, extra library storages
; Advanced options: extra scripting
;
; Please visit documentation for the other options and examples
; https://docs.platformio.org/page/projectconf.html
[env:esp32dev]
platform = espressif32
board = esp32dev
framework = arduino
; monitor either autoset serial
monitor_speed = 115200
#monitor_port = /dev/ttyUSB2 ; uncomment & tune if autoset fails
monitor_filters = esp32_exception_decoder
; upload and debug via esp-prog JTAG
upload_protocol = esp-prog
debug_tool = esp-prog
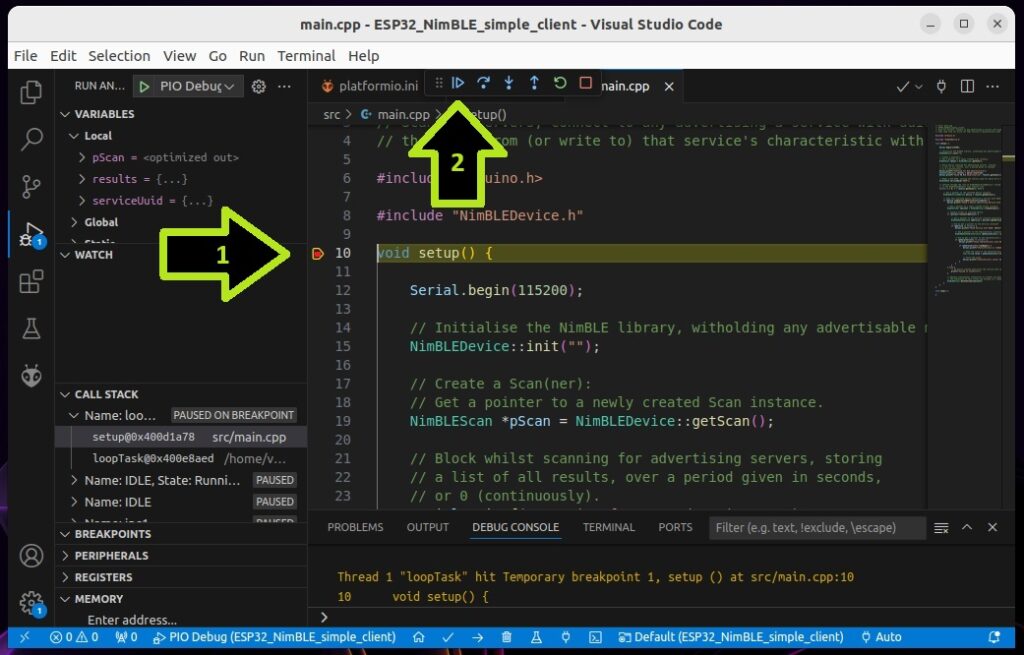
debug_init_break = tbreak setup
lib_deps = build and upload via JTAG
monitor either serial
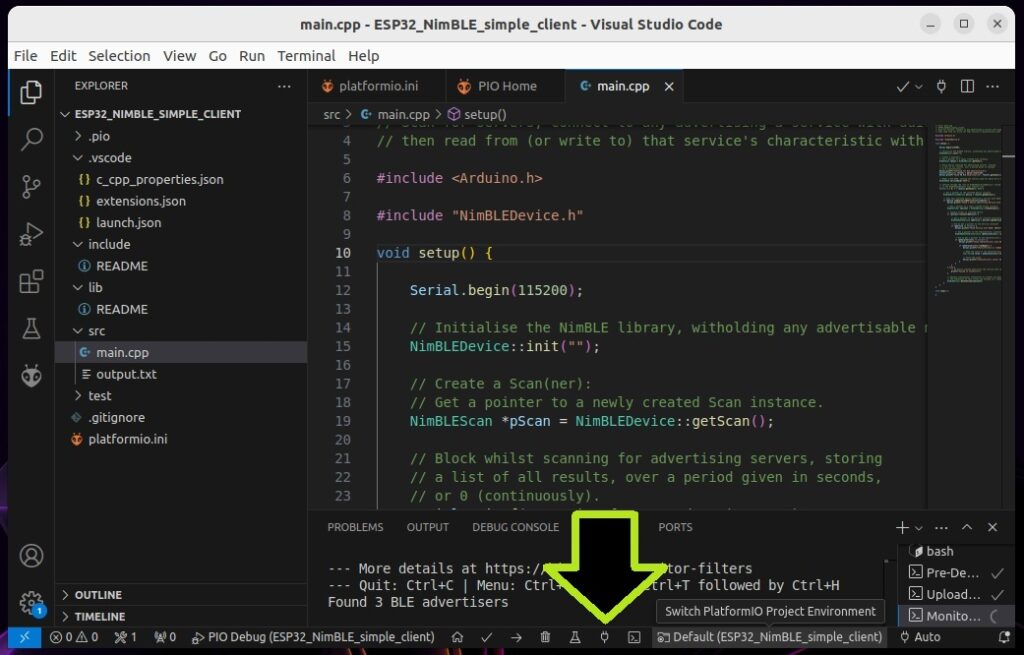
build for debug and JTAG upload
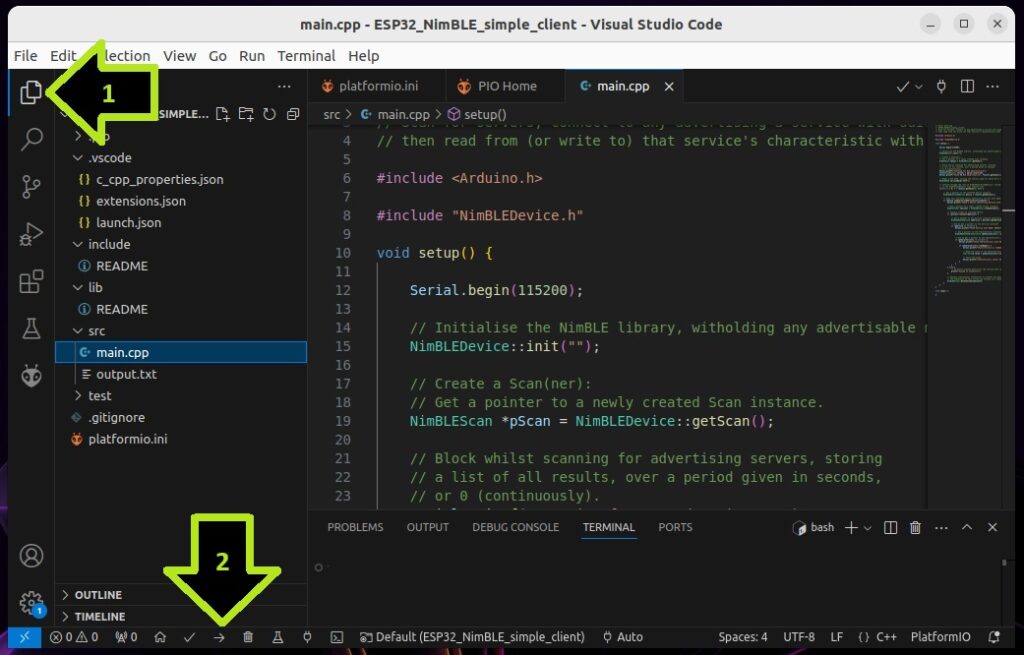
Full rebuild and upload produces lengthy wait, then blue ‘working’ indicator stops and the debugger control pallet appears.
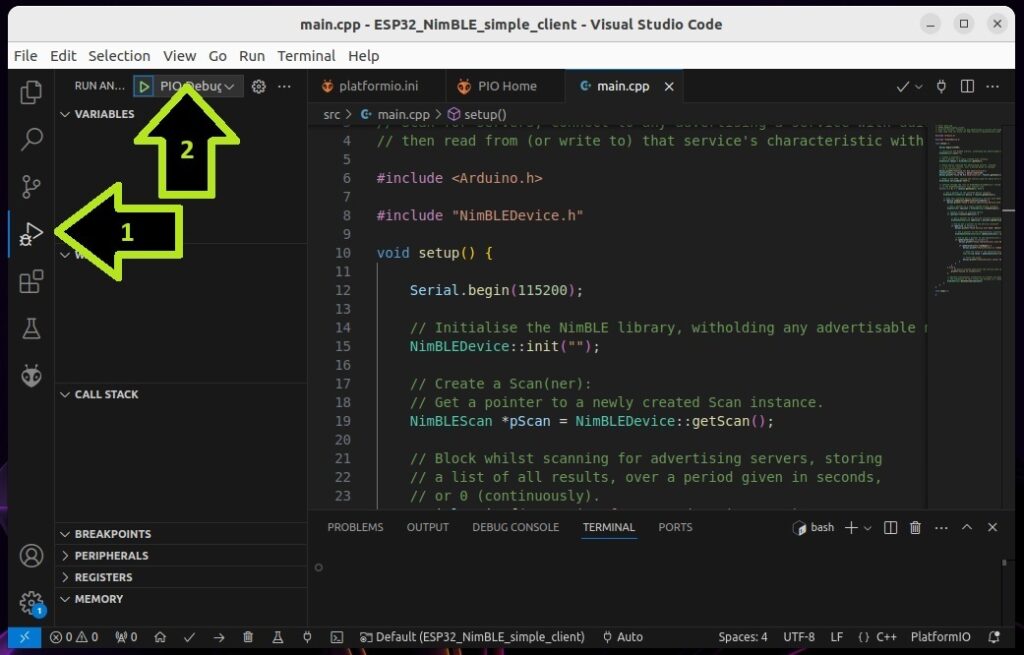
set breakpoint and debug via JTAG
If you’ve found this compilation useful, then your assistance in helping others find it will be both benevolent and appreciated.